Monday, September 17, 2012

Easy Cajun Shrimp & Sausage Boil


Last weekend we really just chilled out and had a great time alone. This weekend it was utter chaos, we didn't get to stop for much. Married a couple, went to dinner with a couple, had marriage counseling with another couple, cooked for the kids after church. Run, then run again. I feel like it was productive but I miss my long lazy weekends. Well, enough whining. The other day my sweet Momma was telling me about what she was making for dinner. It sounded fabulous, shrimp boiled in crab boil and beer. With sausage in it. Now how could that not be good? This shrimp kept popping up in my mind for a week or 2 until I knew I just had to do it. I had to get my hankering to stop. Boy was this the bomb! It was so fast and easy but the taste was spectacular. You will notice I didn't photo the beer. Beer doesn't need publicity. You can sneak into a gas station and buy the cheapest single you can find and it will work perfect. Nothing high fluting. Just a can beer. Thats all. Im not a fan of beer but I do think it makes some great flavors when cooking. So are ya'll ready to spice it up the Sassy way? Here we go. Let me teach ya how to do this thang!​


Ingredients:

​2 pounds medium count shrimp, not cooked with shells on
1 pkg of crab boil​
1 canned beer​
1 package of little potatoes- I choose a fingerling medley of red, purple and gold ​
1 pkg of frozen corn on the cob ( we omitted due to health issues)​
1 package of smoked sausage. ​


Get your big pot rolling with boiling water. Pour in that beer. Don't you drink any of it. Into the pot! Then pour in the crab boil. I used half a pack cause we don't like super spicy.​ Get that crab boil rolling really well. While the pot is coming to a boil cut the sausage up into 1 1/2 inch slices. Not too big or little .. think hunks. Also scrub up your taters and be sure they are clean. If the shrimp are frozen run them under a little COLD WATER. Ya'll if it's lukewarm or hot it will begin to cook your shrimp and they will be tough. FYI. So once that pot is boiling well the first thing we pop in is the sausage. Let it boil on a high roll for 12 mins. After that throw in your corn if you want to and boil 7 mins. We skipped cause hubby can't eat it. I went straight to the potatoes. Cook potatoes 8-10 mins or until soft when pricked with a knife. Not mushy tho, just able to prick easily . Add your shrimp for 3-4 mins. Use your kitchen timer. The time is important. Once the 4 mins are up, cover your pot with a lid, remove from the burner and let steep 2 mins then drain. I ice our shrimp cause we like them cold, but you can serve however you prefer. Eat and enjoy. Peel the shrimp for all you people that don't know. Im not taking anything for granted,. Take the shells off and don't eat the tails! ;) Yummmm


​See.. those sausage are soaking up the spice. Keep your water rolling boiling hot the whole time ok ya'll? You gotta use a really big pot so it doesn't boil over. Thats another little tip for you.


After you've followed the times provided for boiling all the ingredients don't forget to put the lid on them, move off the heat and allow to steep for 2 -4 mins before you drain them into a colander. You know, it's the bowl with the holes and handles on the sides? One of those. Now this blog is for beginners so be patient with the sassybabies who are just learning. We try to be very specific. It's for a reason.​ Some of us really need this additonal info.

 
Now look at that. Isn't it a beautiful thing. I mean impressive. Easy- your man will thank you. Yes I have been called a marriage miracle worker. Cook for him girls. Every man wants you too. I promise. You will get your SassyBelle badge with this one. Just follow the times and directions exactly. The main thing to watch for is not overcooking the shrimp. They will start changing bright color and will curl. They are delicate. No body likes rubbery shrimp. Most newbies think they can't possibly be done that fast. They are. Easy does it!​

 
Serve it up on a nice platter, with some lemon slices. Pull out the cocktail sauce and baby you gonna wow them. This is definitely an easy to do, big results recipe. Stay Sassy ya'll! BTW, did I tell you how delicious this was. Oh my goodness. Gonna make it again soon. Let me know if you make this! Please use the share button down in the bottom right corner!
 

Friday, September 14, 2012

Our very first Sassy Stove Contest on Facebook


Hey ya'll! It's the weekend. Hallelujah. Im so burnt out from all this editing and learning new coding. I've been frustrated all week. So I decided to do something fun. I love to give. It makes me happy. So I decided to do a giveaway on Facebook. All you have to do is go to my page. Find the Enter icon badge up by my banner that shows how many likes I have and click on the pic that says enter. Fill out the form and send it to me. The rules are over there. Here's what you could win!​ 12 spices and seasonings I use frequently in my kitchen. Liquid Smoke, Crab boil, Adobo, balsamic vinegar, allegro marinade. Louisiana hot sauce, Mesquite seasoning, sea salt, and peppercorn in cute little grinders, Zatarain's Big & Zesty Spice Blend, and some Amber Agave Nectar. Just cause I like ya'll. Oh, Im keeping my little pumpkins! Sorry I don't like ya'll that much. Besides you can get some just like them at Walmart!

​Just head on over there and check out the contest! You can enter once a day - read the rules well cause it also shows you how to get additional entries! Hugs and good luck. It's looking like a spicy weekend. Now I'm about to go get gussied up for date night! Stay Sassy!
 

Thursday, September 13, 2012

Animal print dinnerware


​Today I thought I'd share with you all some of the things I just adore. One of them is animal print. I know .. it's hoochie but I never tire of it. Leopard and zebra just make me happy. While browsing the web today I found these really cool plates and just loved them. They would definitely make that peanut butter and jelly take a walk on the wild side. The price is really reasonable too!

                                                     ZEBRA PLATES FROM TARGET


I love melamine plates. I know..but they are glossy, shiny, light weight and no chipping. This plate, Mosaic by French Bull is fabulous. I love love love it. Gonna keep watching for these to go on sale. Love the color. How could you not enjoy a meal off of these? Especially chick food. Like pasta !​


Ok girls.. time to call it a day. I hope you like the functionality of the site so far. We will be having our first contest on fb soon so if you aren't a fan yet like me at the sassy stove over there. Night ya'll. It's time to make supper
 

Buttermilk Biscuits aka World Famous Boyfriend Biscuits


So those of you who know me have learned by now that Hubs is a huge breakfast man. He and my son in law love a huge brunch just about better than anything in the world. The piece de resistance is always my buttermilk biscuits. I must admit, biscuit baking is an art all its own. You really have to practice to get the hang of it. Several factors come into play when making a great biscuit. 1. The skillet. You gotta have a well seasoned cast iron skillet that is only for making biscuits. The only other thing I use this skillet for is cornbread. I guard it like chunky kid waiting on cake at a birthday party. YOU CAN NOT GET THIS SKILLET WET! Let me repeat myself girls. NEVER EVER EVER WASH YOUR BISCUIT SKILLET. I have other cast iron that I do wash etc but not my biscuit skillet. Afterwards you simply wipe out with a dry clean cloth and put away. Simple! You got it? Ok. If you have a good skillet and follow my recipe the way I prepare them biscuits sticking in your pan shouldn't ever be a problem. 2. Be sure they are wet enough. When you first handle the dough you want it to stick to your hands, then you roll the flour in later to make them firmer. 3. Don't over handle the biscuits. They are kinda fragile. Like a newborn baby. Be gentle. Knead in additional flour gently. The more you turn and pound the shorter they will be. So to have high rising fluffy biscuits, less touching is more. Just get the dough to were you can pinch it off and make a nice round disc without it still being so wet it sticks all over your hand. Easy does it.
Ya'll ready. Im about to give you a secret weapon that renders all mankind weak in the knees and googled eyed. Yes, these are how to catch a man biscuits. I am giving you a southernbelle tool that all women need. This will work even for Yankee Belles. Ok, so here we go. Im baring my soul to you. Take a look at these beauties! ​


By the way that one in the back doesn't have a mole, it's a pat of melting butter. Oh yes mam, if you are gonna do these bad boys you top em with butter ! Thats an order girls.

Ingredients:​

​2 cups SELF RISING FLOUR - be sure it's self rising
​1 stick of butter, not margarine left out over night to soften
​3/4 -1 cup of buttermilk, start with smaller amount then add if needed
​3 tbsps of vegetable oil to add to skillet so biscuits will brown
Additional flour on a sheet to knead biscuits gently​

Directions:

​Preheat oven to 425 F. Add oil to bottom of skillet as shown in pic below. In a large mixing bowl add butter and 2 cups flour. Cut in with pastry blender or a knife and fork. Once butter and flour resemble a coarse meal add in buttermilk. Stir just until ingredients form soft dough and are leaving sides of bowl. You may need to add additional buttermilk if dough is too dry. Just a little at a time. It's better to be too wet than too dry before you roll out so they won't be tough. Once dough is ready, turn out onto a floured surface and knead in additIonal dough. Softly until a nice dough forms. Don't make the dough to stiff. It should feel like soft soft play dough. Pinch into the size biscuits desired, place in pan with sides touching. Bake at 425F for 12-14 minutes or until golden brown. Don't over bake. Allow to cool then cover skillet with a round plate, flip upside down to turn out of skillet. Enjoy!
 
STEP BY STEP PICTURE TUTORIAL​
 
Here's the humble cast of ingredients. Yes I do use generic items a lot. the butter, the buttermilk and the vegetable oil ( I seldom use vegetable oil​ so cheap works) Just these 4 little ingredients transform you into the most irresistible woman in the South. Try to have makeup on and a cute sassy apron too! Oh Lawd, they won't know what hit em!


This is the biscuit skillet. I know how it looks. Trust me. Wipe it then leave it alone. You add the oil to the bottom for multi-purposes. 1. Makes the bottom of the biscuits slightly flaky golden.2. Keeps them from sticking. 3. Keeps the pan seasoned. Ta Da!​


Here we go. Cut the butter in the flour. This is a pastry blender. If you don't have one use a fork and knife and cut it up till the butter is consistently smaller than little peas.​


Pour in your milk and then mix until the dough is looking good, pulling away from the side of the bowl. Like this.​


Thats the way it's supposed to look. It's ok if it's sticky , you are about to turn it out and gently knead it. Soft and slow..​
 
 
Good job, at this point if you are like me you gotta be careful and on the watch cause the Biscuit Bandit shows up and mercilessly begins to bang into my leg hoping I'll drop something.​


​She still hasn't understood that the biscuits don't taste good until they come out of the oven. Continue on my fair ladies. Now we pinch and pat our dough into biscuits. I don't know how to explain how i do this. I pinch of a hunk between thumb and index which makes a nice top, then I pat the underside. Whatever you do, don't over pat them. They will deflate. Just gentle little rounds. Put them in the skillet with the sides touching each other

 
At this point you are almost there. Hopefully you did preheat the oven. Time to give these beauties a nice little golden glow. Pop em in the oven for 12-14 mins. Keep an eye on them after about 8. Use your oven light if you can .. try not to open the door. Start cleaning up the mess. I try to clean as I go. When i finish an ingredient I try to put it up immediately if I know Im through with it. I hate the clean up. With practice you'll be able to whip these out in less than 20 mins prep time. I can make them in about 10 but I've been doing this for awhile. Don't hate! Appreciate!​


Wednesday, September 12, 2012

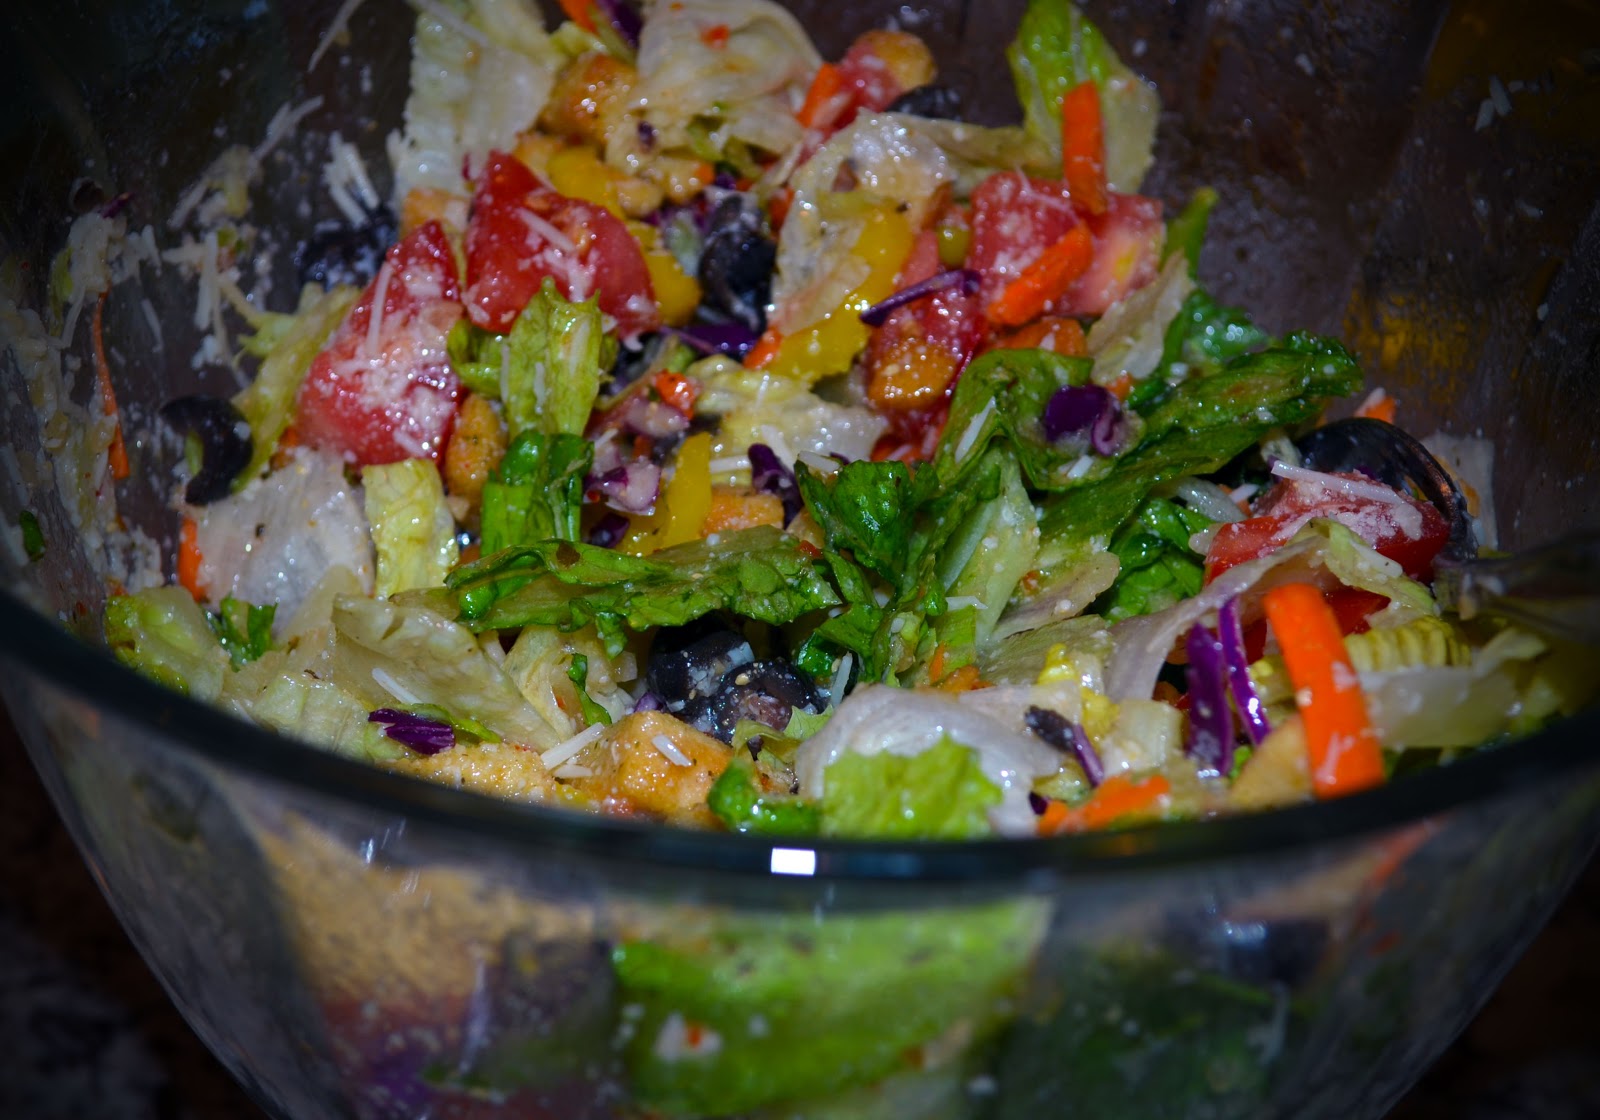
Copycat Olive Garden Salad Recipe

On Sunday I had a crew over and wanted to do something special for lunch but without a big fuss. Several that were eating that day love salad, and who has the best salad? Why Olive Garden of course. I've made this salad for girlfriends when we've had lunch over at the house and everyone raves about it. It's really super simple. Basically the hardest part is remembering what all goes into. Not hard at all! Take a look at this beauty. Now doesn't that make your mouth water? ​


Now when you make this tons of wow factor comes from being able to eat visually with your eyes first. So be sure you put this recipe in a container that is worthy of such beauty. Here are the ingredients you will need. Check them out. Standing alone they are a homely bunch but put them together and you have pure genius!​


Sorry for the pic. You can see my new son in law chilling on the couch. Well ain't he something. He's learned from the best. Let the women handle the food and you watch the ball game.​

Ingredients for Copycat Olive Garden Salad​

​1 bag of veggie lovers salad
1 bag of italian salad​
tomato, chopped​
banana peppers​
purple onion ( which I forgot unfortunately)​
black olives, whole or sliced drained - to taste​
restaurant style croutons​
​Italian dressing- I used 2 kinds, one had Romano cheese in it
​Grated Parmesan cheese, Crumbled Parmesan cheese

Directions:

Chill your salad bowl, open bags of salad, add tomato and onion, Then add black olives and peppers to taste, add cheese liberally . Dress with the Italian dressing, liberally but don't soak it. Just enough to glisten on the veggies without drowning them. Add croutons, one more shake of cheese. Toss and Serve.


Friday, September 7, 2012

Cheating Cheesy Grits Recipe the Easy Way


I'm a sucker for cheesy grits. I adore them. My mom always made them for me for breakfast and they were my favorite. Back in those days we didn't have a toaster but she made me cheese toast to go with my cheesy grits. Yes, We love us some cheese in our family. Besides it was not expensive and filling. Give a single mom a break ya'll!. I loved the way she put the american cheese slice on the bread and then used the broiler. That cheese toast was at its perfection when it blew up like a balloon dome and got kinda all brownly toasted. Ummm so good. ​Then you could peel back the top layer and eat the melty inside too.
Well today I've been as busy as a bee in a tar bucket and realized I haven't eaten. The problem was solved easily and quickly by deciding for cheesy grits. Things don't always have to be so complicated, you know? Sometimes the best things are the simplest ones. ​

Ingredients:​

2 packs instant grits, plain that artificial flavored stuff is for the birds​
1 cup water, I use it hot out of my dispenser​
1/4 mexican cheese blend grated
hunk of chipotle smoked gouda cut into little pieces​
1 american cheese single
salt, pepper, tonys​
​Get your bowl, a nice size one cause this is a lunch portion. Open up your grits and pour them in, add your cheeses. If you have those real bacon bits they are great too, or add green onions or jalapenos, the sky is the limit. I wouldn't do black olives tho- that would just be nasty. Pour in the water, pop in the microwave, cover and give it a minute. Stir and season. Presto. You just made yourself some gourmet cheesy grits. You could even fool your guests by doing this in a big casserole dish and adjusting the measurements. Top with cheese and green onions, sprinkle paprika and parsley on top and you are now the southern MIss Martha Stewart. Of course real grits are much better but it's all about thinking out of the box and having a well stocked pantry girls. Seriously. You Can doooo this. Say it out loud, You CAN Dewww this. Have a great weekend. I'm bout to go shop for some pretty little bowls or something like that.

Lots of Love to my SassyBelles! Try this for breakfast! ​And of course as always, I appreciate you helping me get the word out. Share this post often and frequently.


Thursday, September 6, 2012

Angel's Best Ribeye Marinade

 
Over Labor Day hubs and I had some awesome ribeyes. Of course many of you know this cause I made a great post about it. Then today I accidentally deleted it. So as you can imagine I'm not a happy camper. I've got pins everywhere and links galore that aren't going anywhere now. So quickly here is the worlds best steak rub. Simple Easy and FAB!​


Grab some nice juicy ribeyes, not too fatty but with good marbling​. Wash and pat dry. Lay on something flat. Get out what you are gonna need. Meat Tenderizer, paprika, garlic powder, smokehouse black pepper, mesquite smoke seasoning, hickory salt, olive oil.

 
Ingredients:
2 marbled beautiful ribeyes​
meat tenderizer​
garlic powder​
pinch of sugar​
hickory salt​
mesquite seasoning
paprika​
smokehouse black pepper​
emeril's essence​
Olive oil.

Directions:

Wash ribeyes, pat dry. Sprinkle each steak generously with spices, one at a time. Then rub in. Drizzle with olive oil. Then turn over, repeat. Marinate covered up to 4 hours. I've found that for us the perfect amount of time is 2 hours then take out of fridge to get room temp. Heat grill to 300. Spray nonstick cooking oil on clean grates and place steaks​ on grill. For well done do 7 mins on each side, turning 90 degree angle to get nice sear marks. I like mine medium. I do it 4 on one side, turning at 2 mins then flipping at 4 min mark and cook another 4. Cover with foil to let juices redistribute. Serve with baked potato and roasted asparagus.